We all know that venturing into the mountains around �ϰ������ϲʿ�����¼���� can easily be either the best decision we make or, sometimes, the worst. The experience can quickly turn miserable with a surprise downpour, taking on a trail that is way longer and harder than expected or getting caught out in the dark.
Below I’ve listed four simple tips that will hopefully make getting out into the wild that much better. Also, when I say less than obvious, if you are a seasoned explorer then these points will probably seem like second nature.
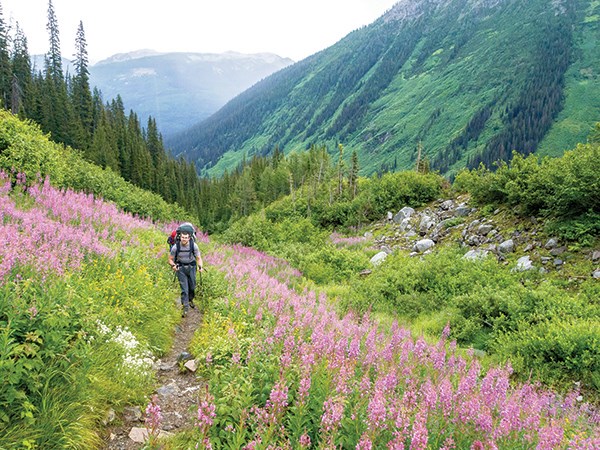
But, for the individual new to hiking and backpacking who has maybe ticked off moderate hikes to Garibaldi Lake and the Stawamus Chief, these tips will help with the transition to taking the paths less travelled.
Break the routine and go exploring, but prepare yourself first. Here are a few tips I learned along the way.
Be bold, start cold
We’ve all been there. You’ve driven to the trailhead in a nice warm car only to open the door and have the cool, fresh air flood in and send a shiver down your spine.
Our first reaction is to immediately grab our puffy jackets, Gore-Tex shells, gloves and toques and bundle up.
We start the hike with all this on and moments later we are sweating profusely from the amount of clothes we are wearing. So we need to stop, take off our layers, pack them away and then start hiking again. Now we have a film of sweat on our skin that will keep us chilled all day whenever we stop.
Stop this cycle by simply resolving to always start cold.
Personally, I keep a puffy jacket in the car if I am hiking with a group and I know everyone won’t be ready to start moving at the same time. I throw this over the top of whatever I’m wearing and, once everyone is ready to start, I take it off, bundle it into the trunk, shoulder my pack and get going.
The feeling of being cold is uncomfortable at first but fades really quickly once you get your body moving. Be bold, start cold.
Don’t go cheap on gear
Shoes and underwear are probably the least glamorous of items we use for hiking and backpacking but, in my opinion, the most important. If you get them all wrong it can make or break your adventure and can change it from being a trip into a beautiful location to an experience you will want to quickly forget.
Buy good footwear, whether you prefer boots or hiking shoes, and make sure they fit well. Modern boots usually require no break-in period and will be comfortable out of the box. Test them out beforehand to make sure there are no hot spots or areas of rubbing.
After you’ve worn them for a bit, take them off, as well as your socks and look at your feet for areas of redness. Areas that appear red after only a few moments could turn into abrasions or blisters after an entire day of moving and sweating in them.
You can get away with cheaper jackets, pants and backpacks, but a cheap pair of boots that causes blisters will literally ruin any enjoyment you have out in the mountains.
On top of footwear, pay close attention to underwear and socks. I am usually surprised by how little attention is given to these critical pieces of clothing. I’ve hiked with individuals in expensive Gore-Tex jackets who admit to wearing whatever cotton underwear they had lying around, as well as simply wearing the same socks they’d use for walking around town.
Look into socks rated for hiking or backpacking. The good ones aren’t cheap but they will likely last you for many seasons, especially if you reserve them only for when you are hiking.
The same goes for underwear. Pick a style designed for sports or backpacking that will dry fast, wick sweat and will not cause you to get cold like cotton will.
These items may cost a bit more and you won’t, usually, get to show them off in photographs, but the added enjoyment they bring to your experience out in the mountains will make them worth their weight in gold.
Always look behind
This tip is more related to navigating. If you are ascending a mountain or working your way through changing terrain and know you will need to reverse your route later, look over your shoulder frequently to see what the way back will look like.
The trail can look very different the other way around.
Take time to always turn around and make a mental note of key features - large boulders, interesting tree stumps and creeks or streams – along the route that you will look for when you need to hike back out.
If there are no distinguishing features then build a small cairn of rocks, which, nowadays, are popping up everywhere beside established, clearly visible trails and lake shores.
But this isn’t why you build a cairn – they were originally used as a visual aid for navigating complicated terrain. When you pass back by the cairn, you could dismantle it or choose to leave it there for the next explorer so that they too know the way.
Compress your gear
Going as light as possible while still being comfortable is key to enjoying the mountains.
A good easy way to drop your pack weight without investing in new lighter tents and camping gear is to simply use compression sacks and a smaller backpack.
Compression sacks compress the air out of your gear and make it take up as little space as possible. If you are someone that rolls their sleeping bag or rolls up their tent then this tip is going to have a huge impact on how large of a backpack you think you need for going camping.
Stuff your sleeping bag inside a compression stuff-sack instead of rolling it. You will be amazed with just how much smaller it is by doing this.
The same goes for your tent. Instead of using the loose sack that comes with it, stuff the tent into a compression sack and compress it down.
Do not fear damaging the tent or sleeping bag.
Personally, by switching over to compression sacks I was able to drop down from using a 50L backpack that weighed seven pounds to using a 32L backpack that only weighed four pounds. I dropped my pack weight three pounds by simply changing how I carried my gear.
Try it out and see for yourself.
Well, there you have it
These are a few simple tips that you should be able to incorporate into your next adventure. Break those habits of always visiting the same trails and try something new.
There are a lot of wild places near �ϰ������ϲʿ�����¼���� just waiting to be discovered.


